
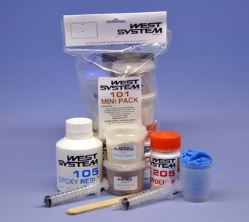
What is Resin?
Resin is a material formed by blending 2 liquids (also called an A and a B component). It will cure as a chemical compound when A and B come into contact with each other
How Dangerous Is It?
Because Resin consists of Isocyanate, which emits toxic fumes in the liquid state and is related to various other epoxy materials – MUST – before you even start, make sure you have the following 3 things at your disposal.
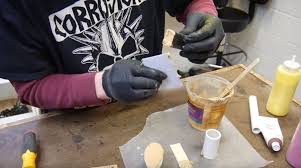
1) Rubber gloves
Remember too!
You should not wear the same rubber gloves for a long time at a time, as the vapors from the mixed resin over time will also penetrate these. Ie that gloves should be thrown out after use.
2) Very! – Very! – Important!
A good and proper ventilation! – due to the toxic fumes of Resin while it solidifies
3) If your ventilation is not sufficient or you work with resin in larger quantities, always use a respirator filter mask.
And if it’s really bad (Yeah Baby, we’re talking safteyoutfit model “Outbreak” starring Dustin Hoffman)
Important!
When you have finished working with resin, remember to wash your hands thoroughly with warm water and soap, even if you have been wearing gloves. The use of solvents for this should be avoided.
If one is unlucky to get the liquid resin on the skin, it is almost impossible to remove again. One can pre-empt the problem by using a skin cream before starting to cast. In such a dish soap or a good hand clean can handle most of the cleaning – otherwise the resin must be worn off.
The problem is that resin hardened on the skin sticks to it and is water resistant. So the soapy water cannot enter between the plastic and the skin and separate them.
If the accident has occurred, the best solution is to make the skin sweat so that water (sweat) comes between them. A trip in sauna is an effective means and in the absence of better, 10-15 minutes with the hands in a dish of very hot water can also solve the problem (but it is always better than getting liquid tin on your fingers!)
How to mold with resin?
Generally, it is cast in resin, which one would cast with tin, ie. by pouring the liquid molding material into the mold and then allowing it to cure. In most cases, it is therefore possible to use a mold in which tin is cast, also to cast resin.
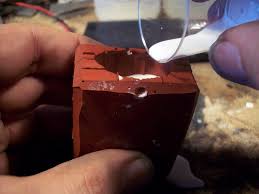
You start by mixing the two components A and B together in a plastic cup, glass or the like,
In most cases, the ratio between them must be fifty-fifty (A 50%, B 50%) or whatever the manufacturer indicates.
Important!
Be careful with dosing and stirring, as otherwise the result is useless.
It is a good idea to use 2 syringes (without needles) (one for A and one for B) to make as accurate a dosage as possible. These are available at pharmacies in various sizes.
You can choose to mix fillers if you mold very large items. But here I will, however, refer to what the manufacturer indicates in the instructions for use
Important!
Components A and B are sensitive to moisture and therefore molding in damp rooms is not possible
Once the two liquids have been thoroughly stirred up with one another, one can either choose to pour the thin liquid resin directly into the mold, or if the situation requires it to wait until the resin is of a thicker honey-like substance, which it begins to stay in a few minutes after the stirring has started.
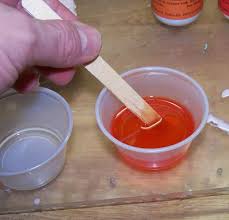 Note! – The time you have a thin casting mass is thus very short – therefore, small portions. On the other hand, a mold can be filled several times. It is important to avoid air bubbles in the resin if you want the best possible casting result.
Therefore, by using either a toothpick to prime / dab the air bubbles or with vibrations (e.g. with the aid of a shaking brush), these air bubbles can be removed while the liquid is still in a thin liquid state. This procedure should usually be done when the resin is just poured into the mold.
Once the liquid resin has been poured into the mold, it must stand and harden, preferably in a reasonably ventilated room temperature room.
The curing of the material – in contrast to tin – must take place for some hours depending on the temperature and what the manufacturer prescribes. I myself prefer to leave it for 24 hours. (Then I can kill time playing Jack Bauer while I wait).
Various casting techniques
As with tin casting, travel casting has different casting techniques. And I will therefore briefly describe four different travel support techniques I know of.
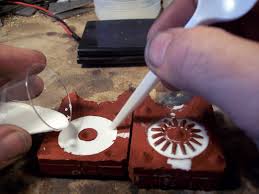
The first, which is the traditional and most common method of back molding, is to pour the mixed liquid into an open single mold

The other is to pour the mixed liquid into a 2-part mold as in the case of tin casting
The third is to pour the mixed liquid into each half of a 2-piece mold, allow it to harden for a while and then squeeze the two halves together.
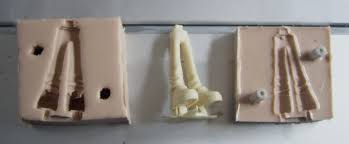
The fourth is to pour the mixed liquid into the deepest half of a 2-piece mold, and then squeeze the two halves together.
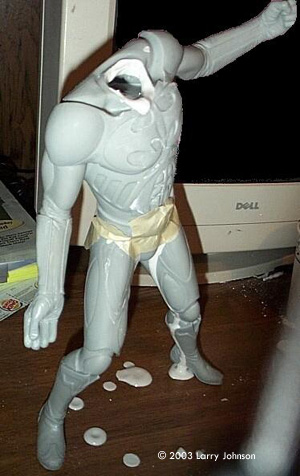
Processing of molded items.
When the resin is cured, it does not release more toxic fumes. But when processing the material, its dust particles are just as dangerous. So, it is recommended to wear a dust mask when it is filing in it.
 Larger holes in the workpiece can be filled with polydiene or other filler. If you cut it, it is important to note that it can be a brittle material, depending on the type of travel, to work with and therefore can easily break. But usually this is no problem unless you work with small thin subjects.
To bond items with one another, you use super glue or contact adhesive
For painting, ordinary craft paint (oil or water-based) is used without problems
Advantage
The long curing time and the initial high viscosity of the resin make it easier for the molding compound to run out at all ends and edges of the mold.
This means that the use of air ducts in the mold is not necessary to the extent that it is for tin casting (perhaps in casting technique 4)
One can much easier make small thin and complex items.
Do not stand with 300 degrees of hot tin
Plastic pipes / rods / parts can be cast into the workpiece such as gun pipes for a gun tower
Disadvantages
Unfortunately, a mold casting cannot be remodeled or restored (unless the aircraft is supposed to have a detached wing)
The number of molded items in one day is limited
Improper mixing ratio and agitation can result in poor molding results
Only super glue and contact adhesive can be used to bond
(and yes, as mentioned before – very toxic)
Wish List
Working Materials:
Resin A and B component
Plasicrør / rods / parts
Molding tools: 2 syringes (one for A and one for B)
Plastic cup and the like for stirring (preferably with pouring spout)
Studs (preferably with a flat end)
Toothpick (or shake powder)
and one or more molds
Tools and others for preparation:
Scalpel / hobby knife and the like.
File / sandpaper and the like
Pollyfylla and the like. (only needed for bad casts)
Super glue or contact adhesive
Safety equipment:
Rubber gloves
eye Protection
Breather
Skin cream
Dust mask (respirator for longer / larger castings)